Taking one picture

The image had been forming in my mind over seven days.

Monday 16 January’s sky was huge. Six in the evening and it was obvious we were in for something special. I like to get to the coast if I can for big skies. I’d also been thinking of capturing an image of the old Pylons at Princes Pier, Port Melbourne. For a while.

When I arrived there it was obvious many others had the same idea. One might think it easy to compose a spectacular shot at this location. Many have been taken. I’m yet to find a composition there that I could really feel satisfied with. The sky came alive big time around one minute past Nine. That might have been twenty minutes after sunset. For about a minute. A few shots were banked, but that’s not really today’s story.

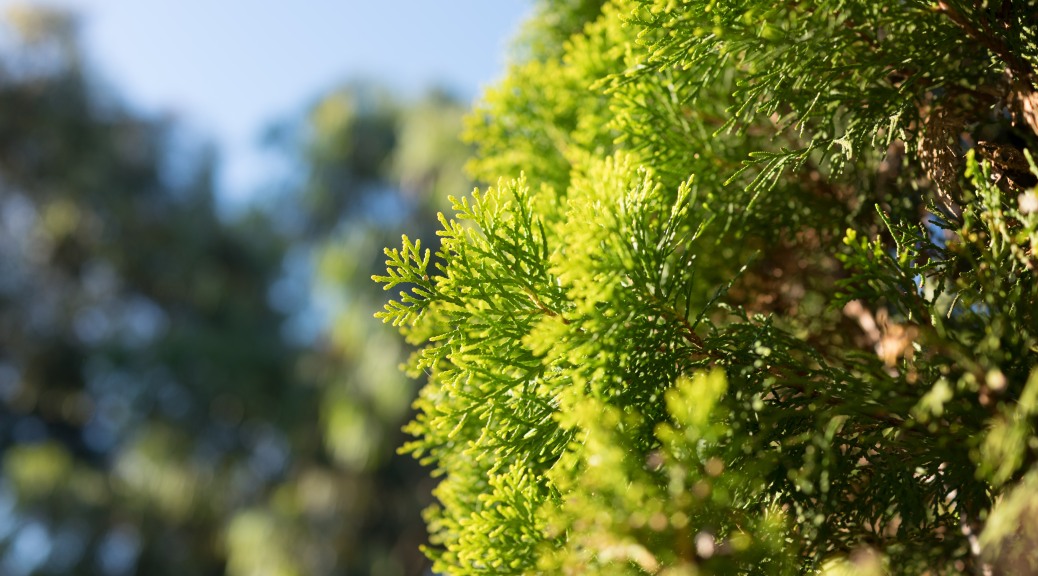
While I was in the area I was quite taken by the simple beauty of the “Front Light” at Beacon Cove (right next door to Princes Pier). A couple of shots were stored and then I moved on to the Pier itself. That’s where all the tripods were clustered after all!

But reviewing the pics afterwards I found myself drawn more to pure simplicity of an old beacon than complexity of hundreds of pylons pointing skyward. Not that those pylons aren’t interesting. Just that the sky, itself, was so amazing. So last week’s mistake was following the tripods, and not staying right where I was. I need to be more instinctive.

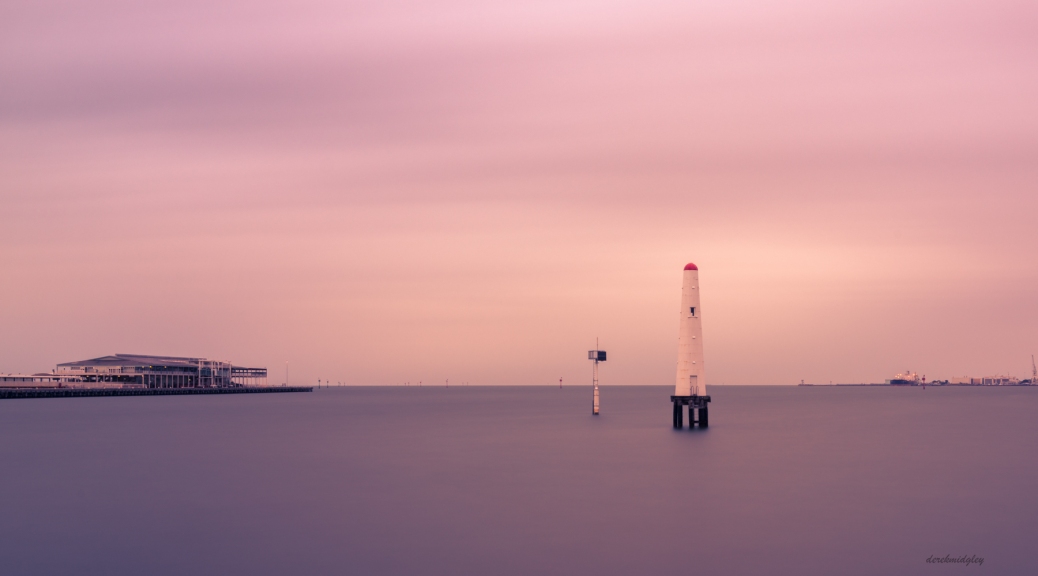
During the week another image formed in my mind. What would the lonely beacon look like with an extra long exposure backed by dark / stormy sky. The idea with long exposure is to simplify the water to… smoothness. And also to create some “drift” in a sky. It’s a trick that works especially well in poorer weather when the light is softer, maybe when there’s less interference from shadows.

I didn’t have to wait too long to find out because the evening of Monday 23rd saw some serious heavy clouds all over. The atmosphere was positively pregnant with rain when I reached the location wishing I’d left work earlier. Sporadic drops fell. Set up would have to be very quick. So many times it seems to take hours to reach a location. But often you only get a handful of perfect minutes to get the shot.

But I’d been there one week before, knew exactly where the tripod would go and had pre-visualised the composition. Had an idea about all the exposure parameters. Focus. etc. So it all came together very quickly like this:

a) Position tripod; camera on; make sure 100% level; get it focussed; switch to manual focus so the focus can’t change; attach lockable remote release cable to camera;

b) Set camera in manual mode and set aperture to F16 and ISO to base of 100. Meter light. Camera suggests 1/6s.

c) Attach ND1000 filter to camera and immediately commence exposure (lock the remote release); no time to waste with maths;

d) Grab phone and set timer for 5 minutes (following instinct). Now divide 6 into 1000 and think = 166 seconds => about 3 minutes. Consider: do I follow the pure maths or instinct? It’s getting darker by the minute. Rain could come soon. There might not be another chance to go longer. Stick with five minutes.

e) Lens cloth comes out and is used to very gently wipe the occasional rain drop from the filter.. gently so as not to shift the camera. Try to shield the camera from rain. Should have had an umbrella.

f) End exposure after five minutes and have a look. Wow, it’s sharp. Histogram view.. balanced in the middle… nothing clipped… !

Rain is coming. Camera goes back in the bag. Image (raw file) finds its way to Light Room.  The simplicity of this location can be presented in so many different ways. There are simply so many different ways to crop and process. Here I’ve shared only one of them, my favourite for the time being, but maybe, another day, will be another, and maybe more still!

(Captured with Sony RX1Rii ISO100 F16 307s)


Meatloaf

Let’s start by observing it’s not rocket science. Not even cooking science. Anyone could make it. Even me. Basically it’s 500g of ordinary beef mince mixed with a bit of this and that and then baked in an oven at 180 degrees c for an hour. The taste vs effort ratio is so good I’ll certainly make a habit of making it. And this is how:

Ingredients:

  • Baking powder 1 tsp
  • Baking pan, loaf shaped
  • Beef mince 500g
  • Bowl 1 (in which to combine all edible ingredients)
  • Bread 2 or 3 slices
  • Chilis 3 red or green (I used about 50g of a tube of Red “Hot” Chilli stir-in paste)
  • Coriander a small bunch (I used about 50g of a tube of stir-in paste)
  • Cumin 1 heaped teaspoon
  • Eggs  1
  • Electric whisk / bamix (to shred/blend the the onion and any other solid ingredients like parsley, chills, etc. beyond recognition)
  • Garlic 3 cloves (or I used about a TBSP of paste)
  • Heat 180c
  • Love, just a little bit
  • Milk 1/2 cup
  • Onion  1
  • Parsley  a small handful (or 50g from a tube …)
  • Paprika a good healthy shake
  • Pepper (freshly ground black pepper = best) about 1 tsp
  • Salt 1 tsp
  • Time 60 minutes
  • Tomato paste 50g

Grief, how did the list get so long?! Ok, getting all this together’s the hard part, but, if you don’t have everything above, don’t stress, improvise.

Now for the fun part:

Set oven to 180 degrees.

Put the bread and milk in the bowl. Peel the onion and blend it in a suitable blender. Strip the seeds out of the chilli , and blend with the onion. Blend in coriander, parsley, etc. Add this eye-watering (yes you’re probably crying by now.. cause I was) concoction to the bowl. Put everything else in the bowl.

Now put your hands in the bowl and mix everything together with love. Maybe a couple of tears will drip in also. Thanks, onion.

Transfer mixture to greased loaf pan (I used a soft silicon pan) and shove it in the oven. Wash hands. Wipe eyes. Kick back for 45 minutes. Have a look. Should be getting nice and dark brown by now. Maybe it’s ready, or maybe it needs 15 more minutes. Depends on your oven. Crack open a bottle of red wine and start drinking in eager anticipation. Or maybe not. Bake some potatoes in the microwave and make a salad.

After about 60 minutes … enjoy, with caution. It just might be deliciously addictive.

DSC01767

RX1 Rii – Review in progress – part 1

This might take me a while. An indeterminate time, like weeks, months or more. I’ll add pics as I shoot some. But just the one tonight.

It arrived today. After a couple of days in DHLimbo.

A couple of hours in and I’m able to say:

  • It’s so much more solid in the hands than i’d imagined it could be
  • A couple of minutes and you begin to appreciate it really is at a different level vs little brother RX100 series build quality;
  • It’s hungry for batteries .. very hungry;
  • Amazing image quality, feels effortless to get great results
  • Incredible resolution .. can’t begin to believe how deep one can peek into pictures
  • Pictures have a genuine depth / three dimensional feel

Ok it’s my first full-frame camera. I waited years to take the plunge, afraid of what i’d end up spending on lenses. This one’s a good entry because it already has a phenomenal lens and I can’t exactly waste money on more lenses for it. I have plenty of experience with plenty of smaller ones. No point in listing them all here. This one will kill them all when it comes to picture quality.

But there’s always more to a camera than image quality. Of course we desire the best iq but an operating system can make or break the user experience.

Right from the beginning I found Sony have fixed a couple of things I feared they wouldn’t:

Most importantly (for me): Now we can explicitly define the slowest shutter speeds the camera will reach before it begins to increase ISO in aperture priority mode. Absolutely perfect, at last, thank you Sony!

Not as important, but very nice to have: we can choose to enable or disable Auto ISO in Manual mode, and, much like the Ricoh GR in its TAV mode, if we enable Auto ISO in Manual mode , we can actually apply quick exposure compensation. Wow. Ok , many will never need this. For most of us manual should be purely manual. But on this camera I can have it both ways. Pure manual , for, e.g. tripod shooting at night. Or, Ricoh TAV “styled” manual for street shooting.

No pics to share yet. Sorry. Boring. But the details above have me quite excited and anxious to get out and shoot some street to see how it goes in the “real world”.

A topnotch WordPress.com site